3.2 Sound Sensor
3.2.1 Overview
The sound sensor, with excellent sound reception, mainly contains a high sensitivity microphone and an LM358 operational amplifier. Weak sound signals are captured by the microphone and amplified by LM358, so the output is clear and recognizable, which can be effectively detected the sounds.
This sensor features high sensitivity, fast response speed, so is widely used in sound detection and recognition, providing a stable and reliable voice input solution for various intelligent devices.
3.2.2 Schematic Diagram
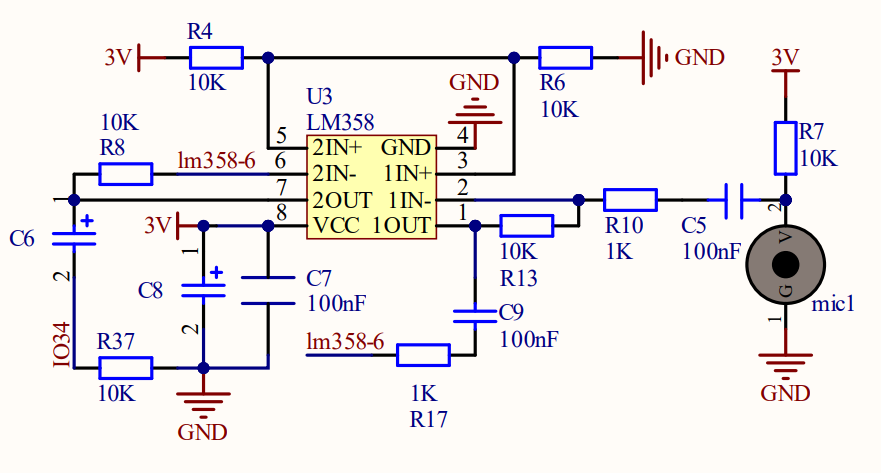
Working principle: If the built-in electret film vibrates after receiving sounds, its capacitance will change to produce a tiny voltage. The LM358 chip is adopted in circuits to amplify the sound signals detected by the high-sensitivity microphone.
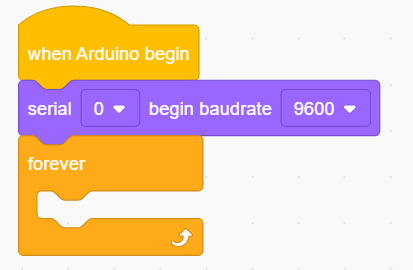
3.2.3 Code Blocks

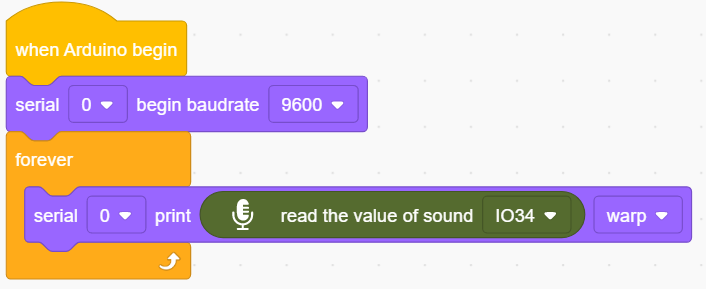
This block sets baud rate, generally 9600 or 115200. In this project, the baud rate is 9600 by default.

This block sets printing content on the monitor. There are three printing modes can be set: warp, no-warp, HEX(hexadecimal). Warp is the default mode.

This module reads the analog value of the detected sound.
3.2.4 Test Code
3.2.4.1 Build Code
There are two ways to upload the code: directly open the code file we provide; or manually build blocks.
Directly open the code file we provide:
Click
 and choose
 Load from your computer
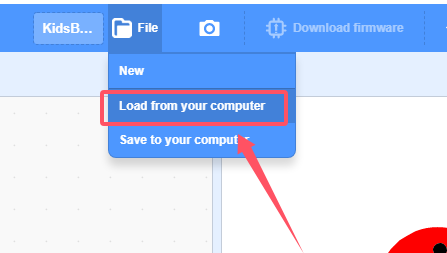
We have already downloaded the codes on computer desktop, so open the file and choose
3-2-sound.sb3
Manually build blocks:
In
 , find
  block.
In
 , find block and set baud rate to 9600, and put it under .
In
 , put
, put  under
under  .
.
In
, place block into In
 , drag and put into the content box of .
Complete Test Code
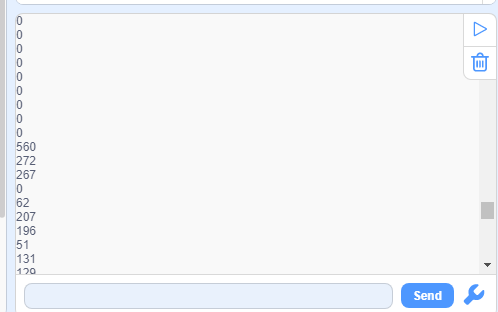
3.2.4.2 Test Result
After uploading code, the analog value of the sound will be printed on the serial monitor. Note that click  to set the baud rate before uploading code.