Project 06: Breaker
1. Overview
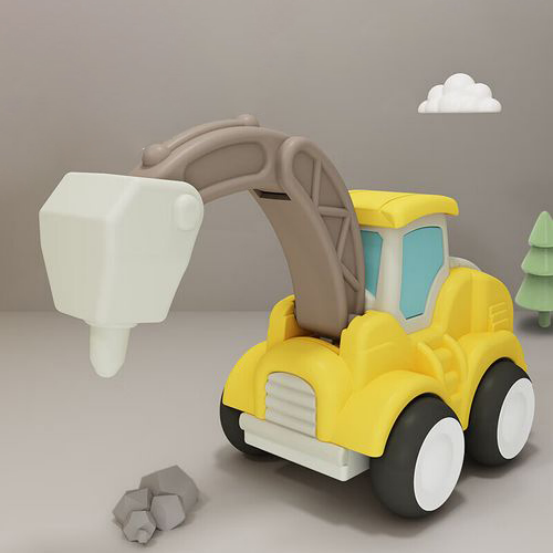
Breaker is a machine that can level out uneven pavement. In this project, we will make one together!
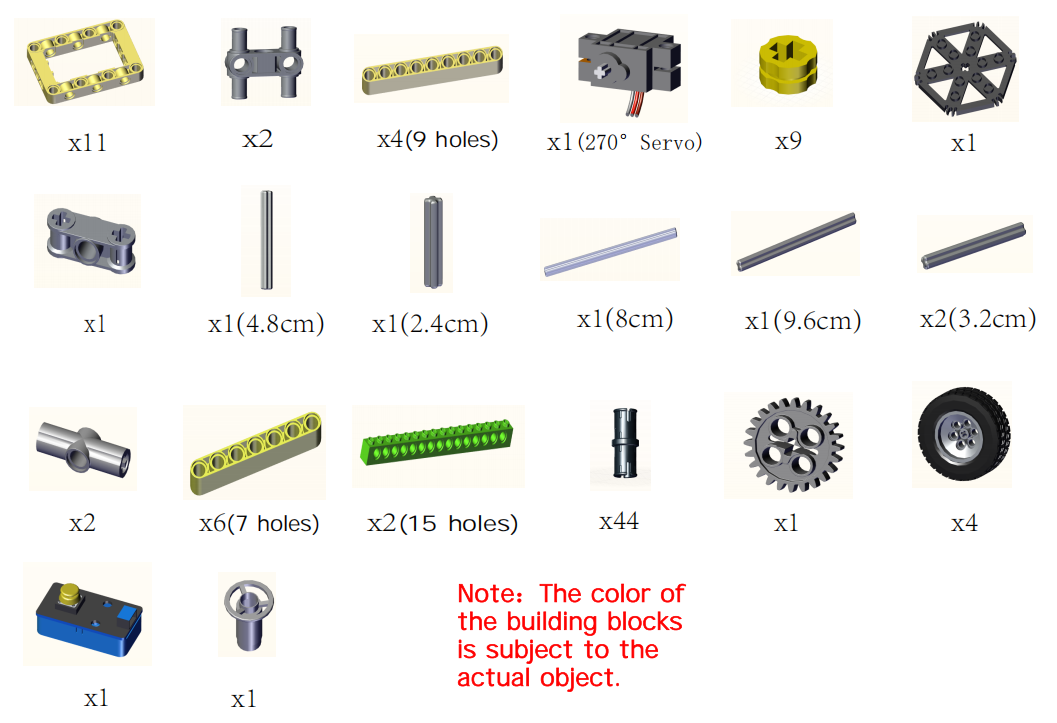
2. Components
|
|
|
|
|---|---|---|---|
Kidsuno Mainboard×1 |
Button Module×1 |
270° Servo×1 |
Connection Wire×1 |
|
|
|
|
Wheel×4 |
USB Cable×1 |
Lego Series×1 |


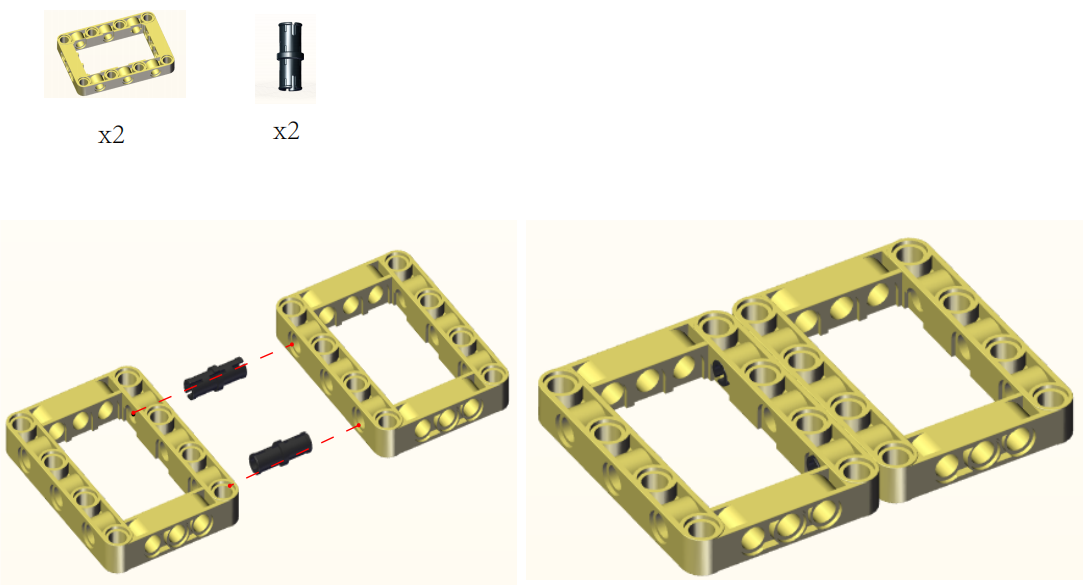
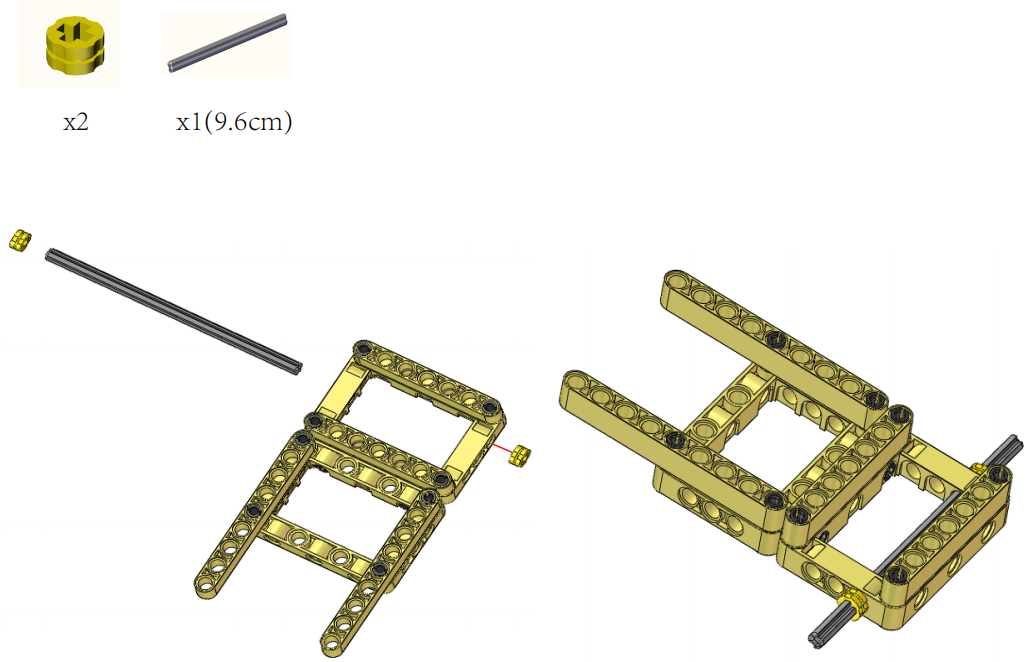
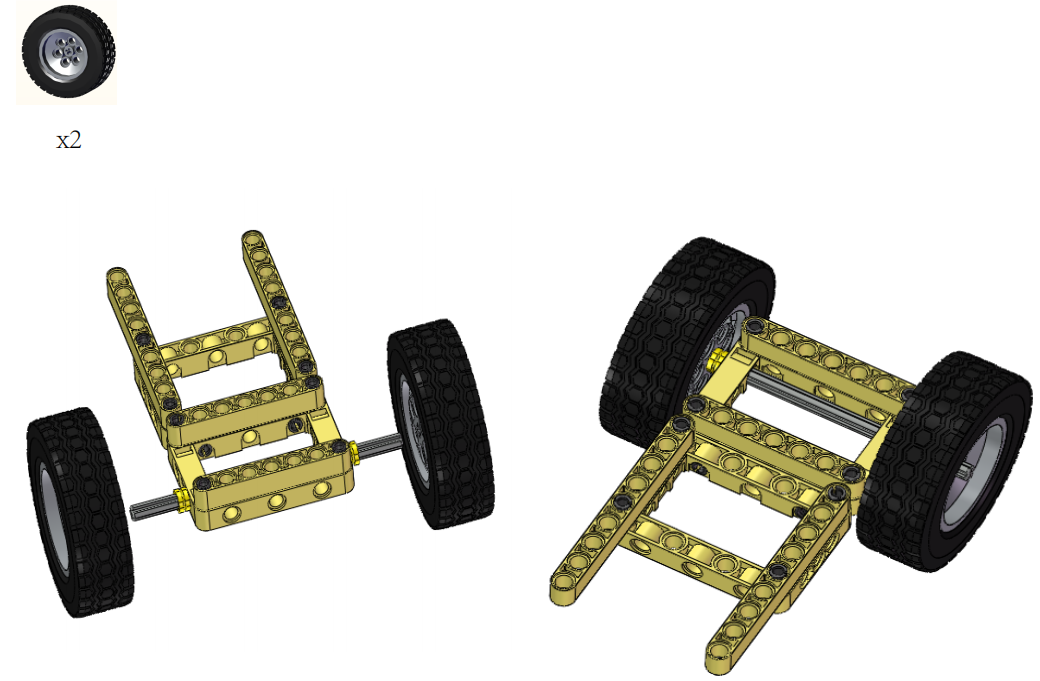
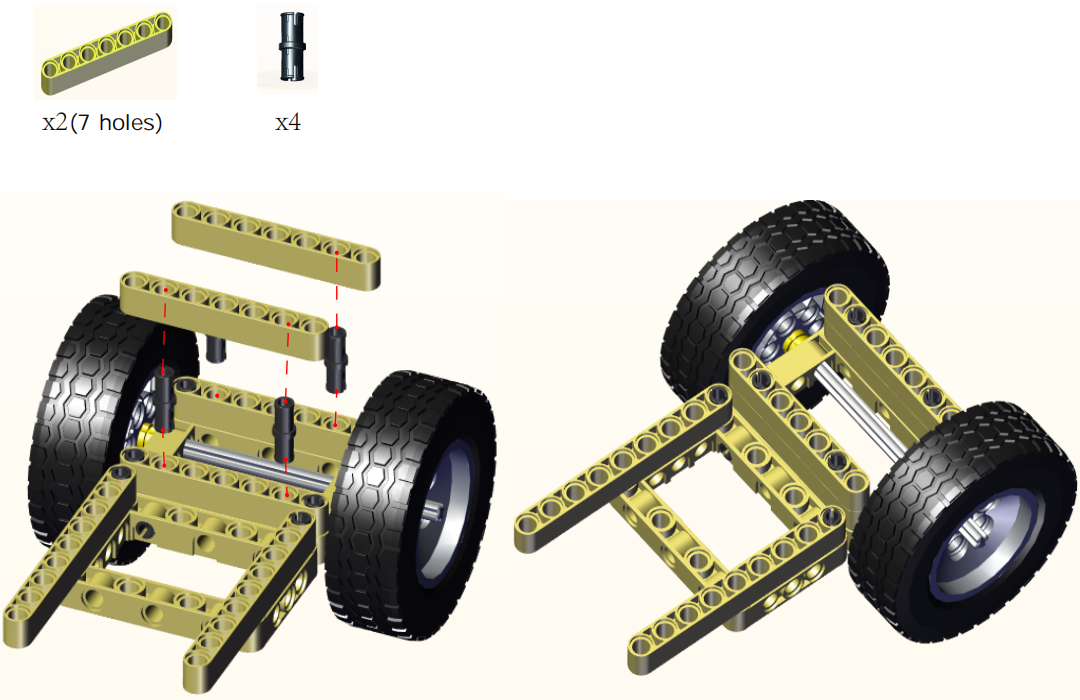
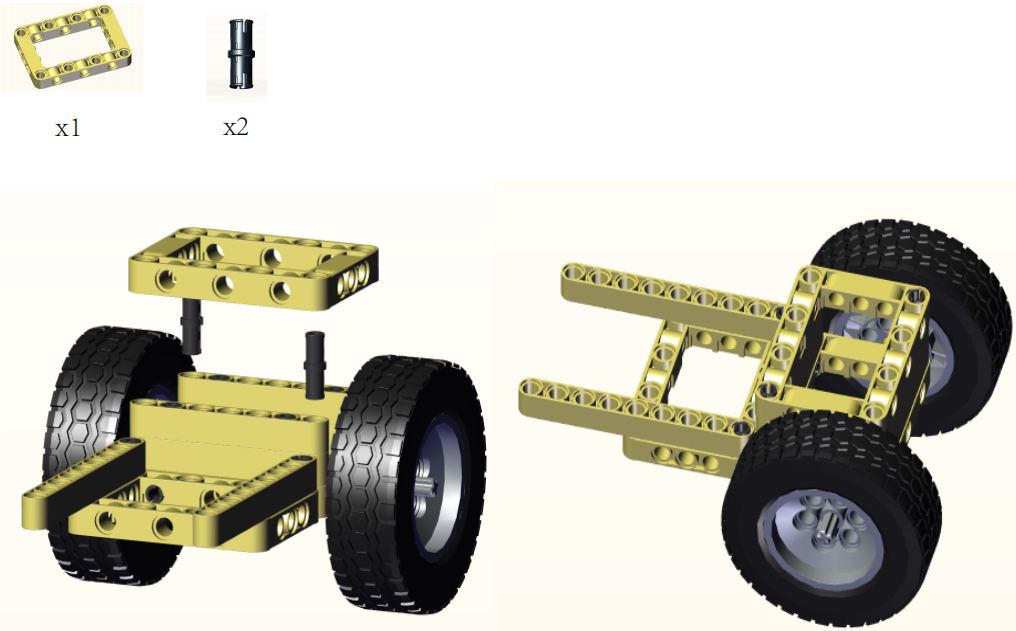
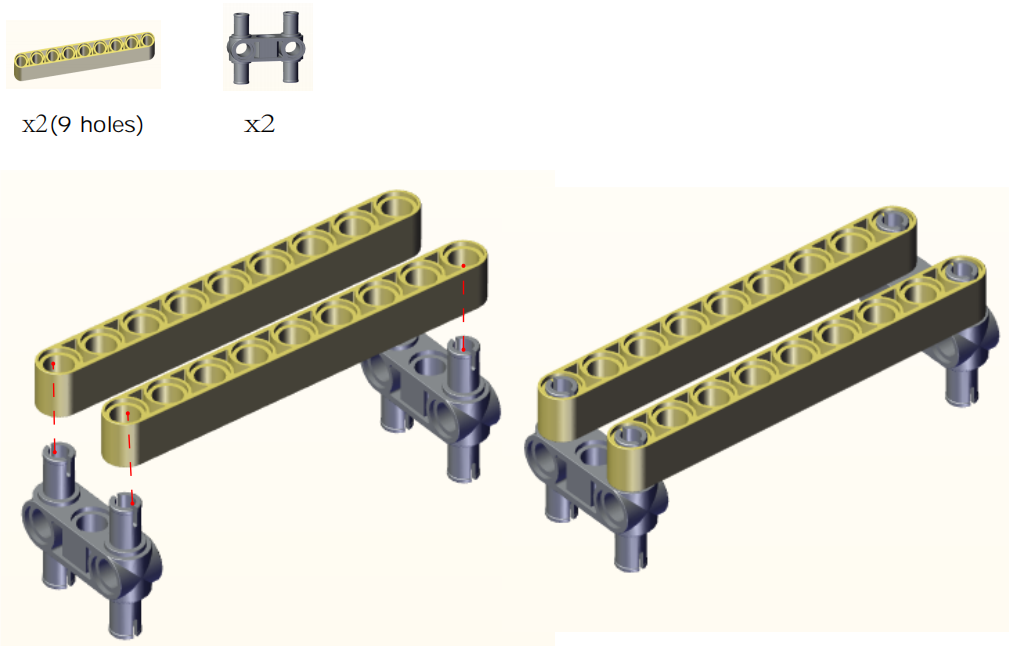
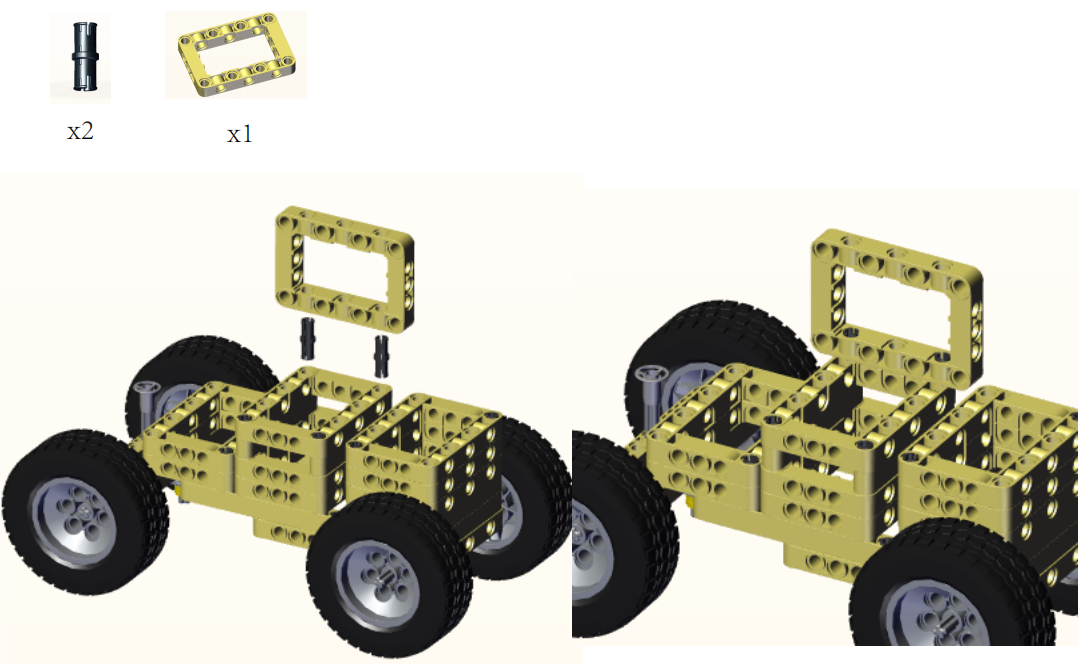
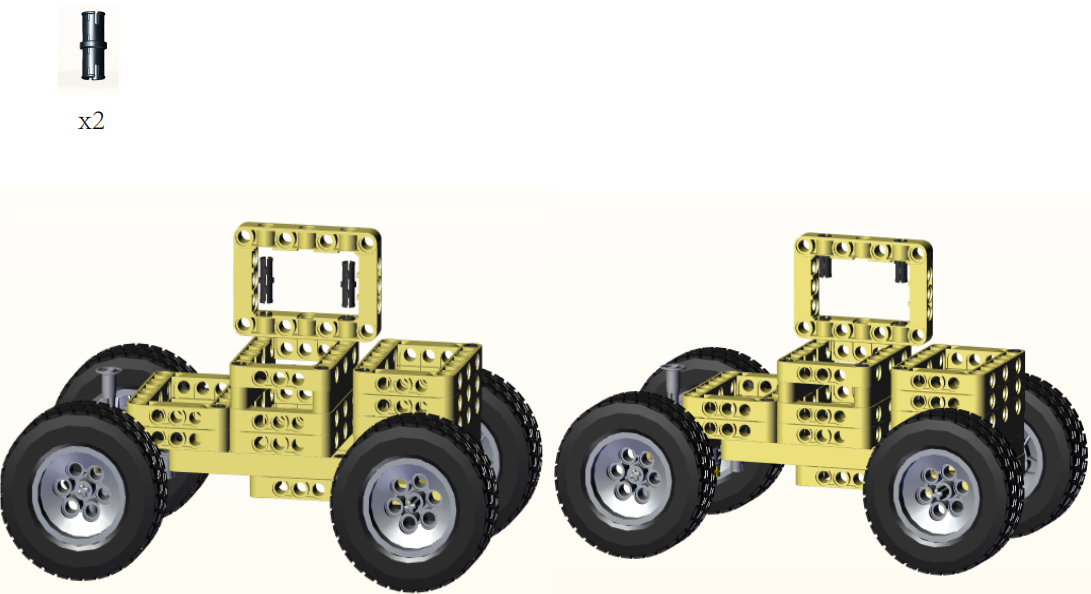
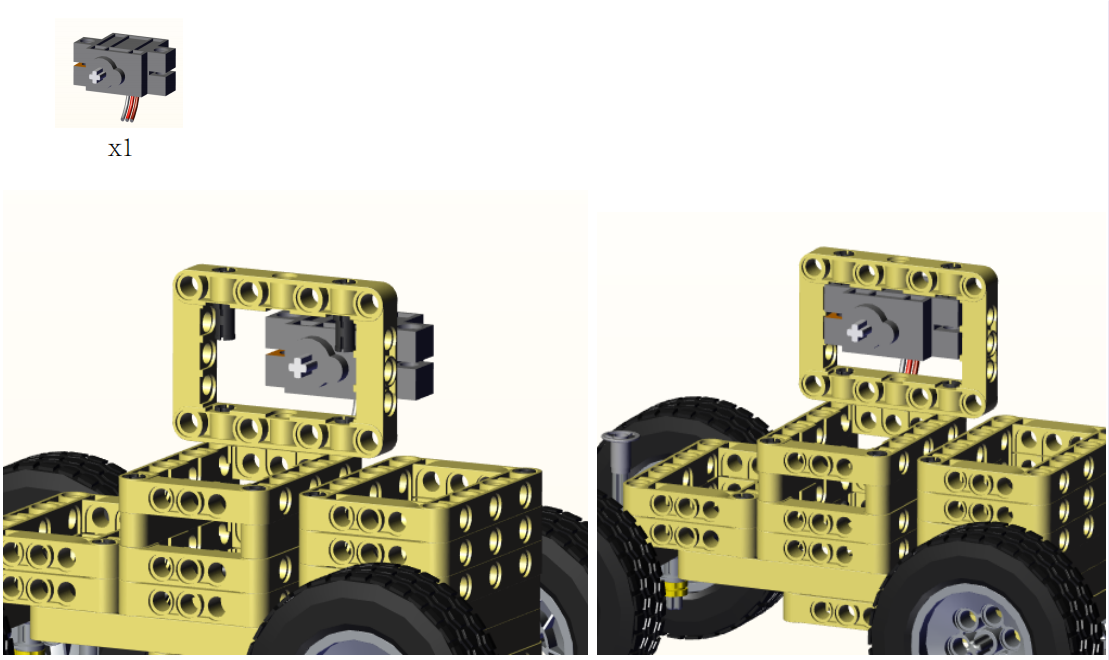
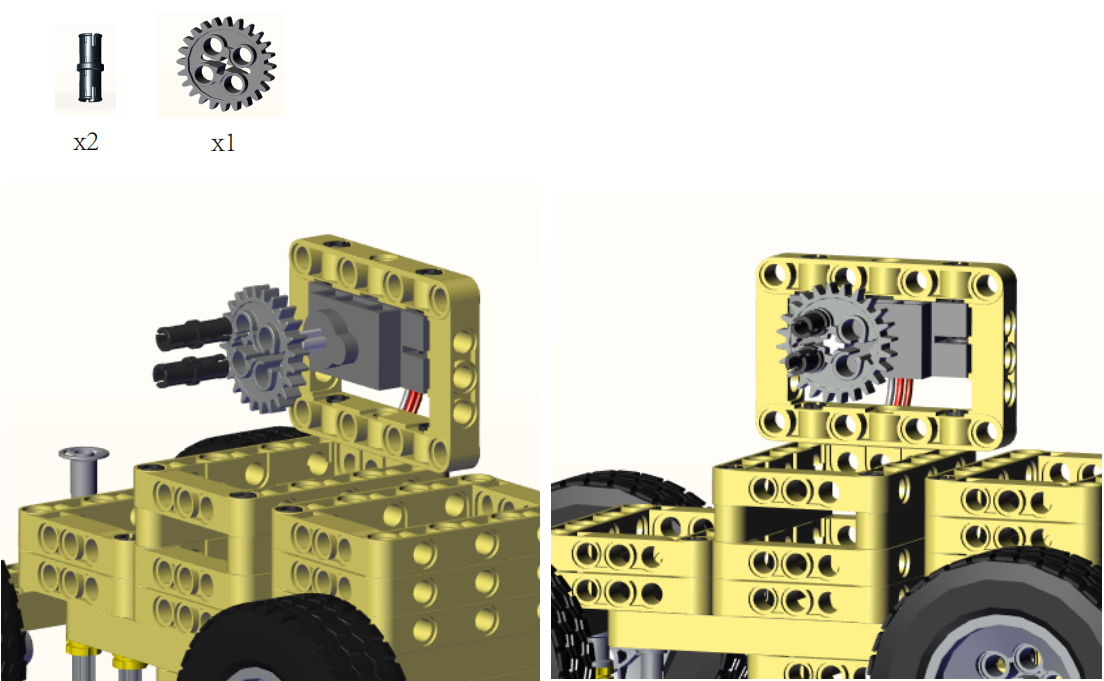
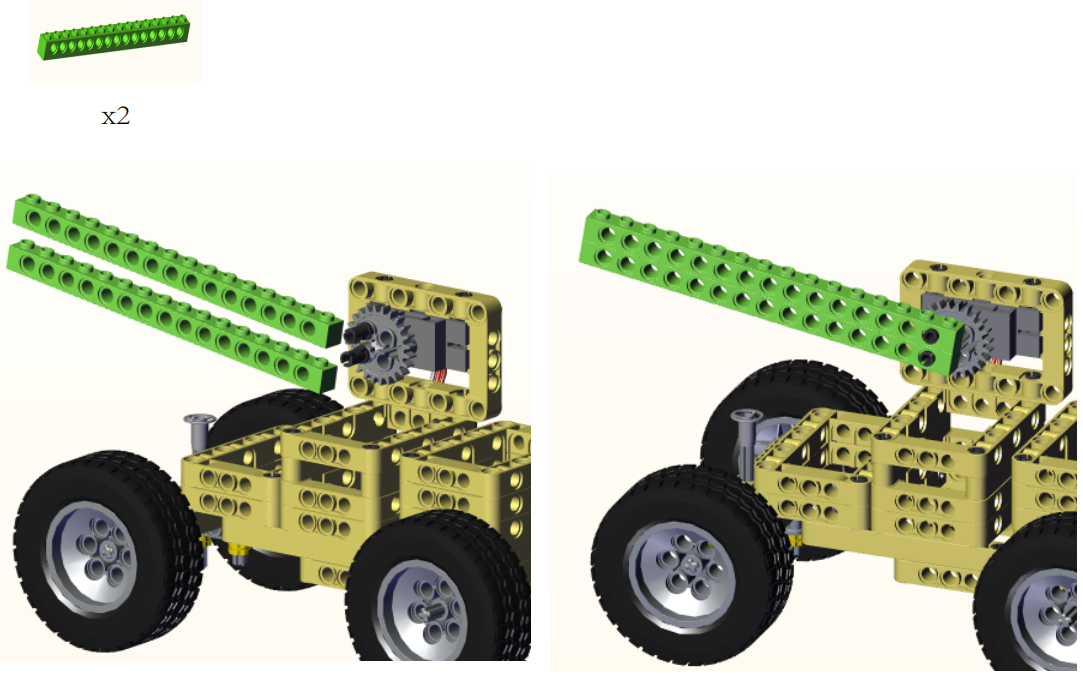
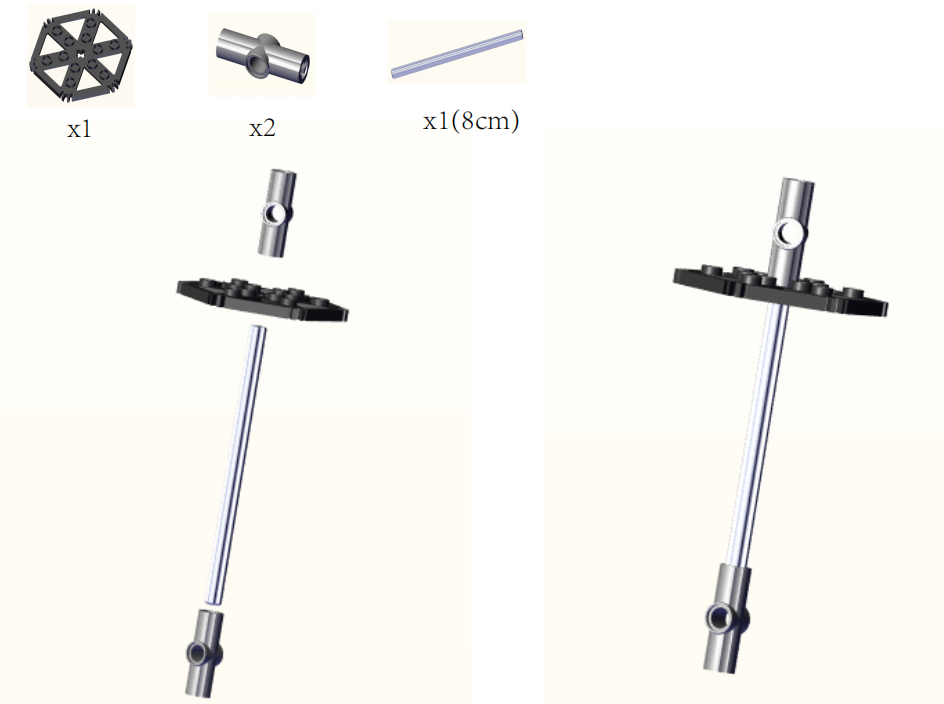
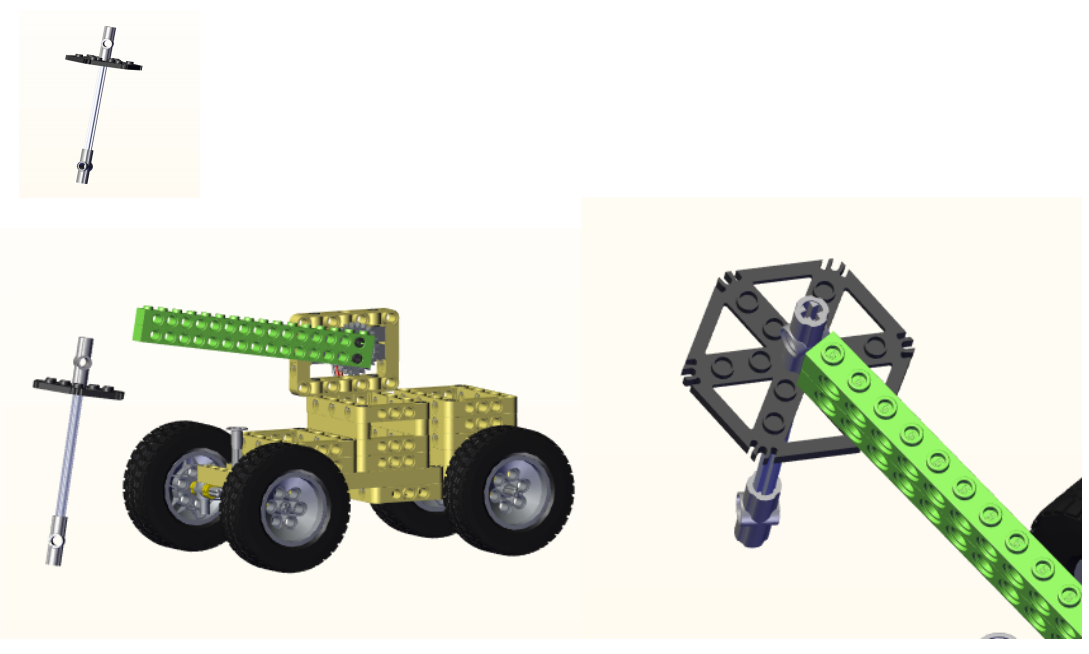
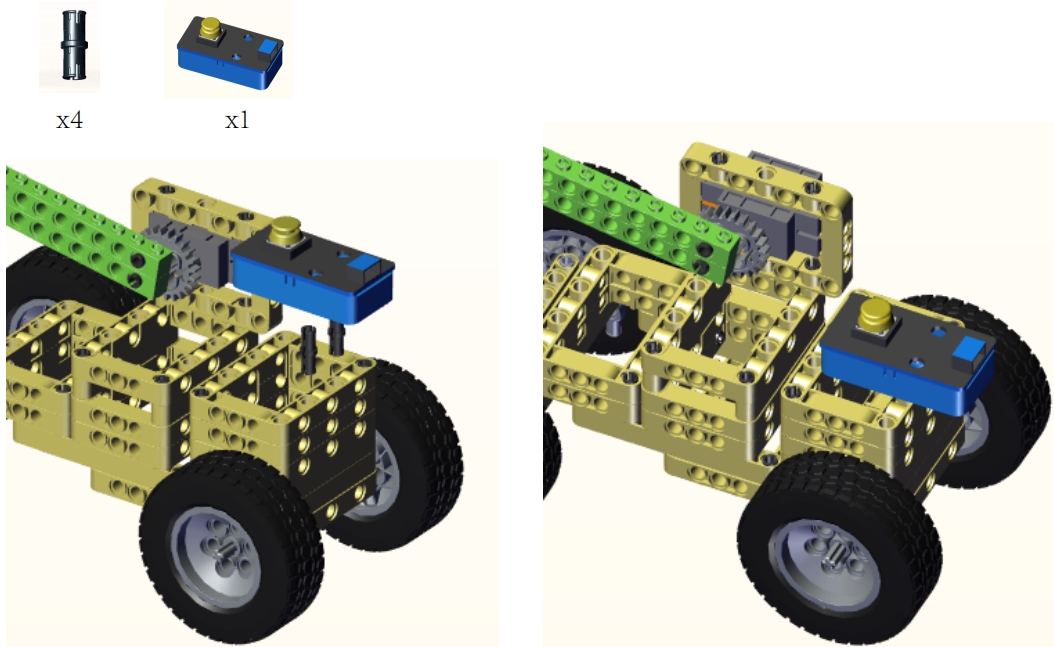
3. Installation
Preparation:
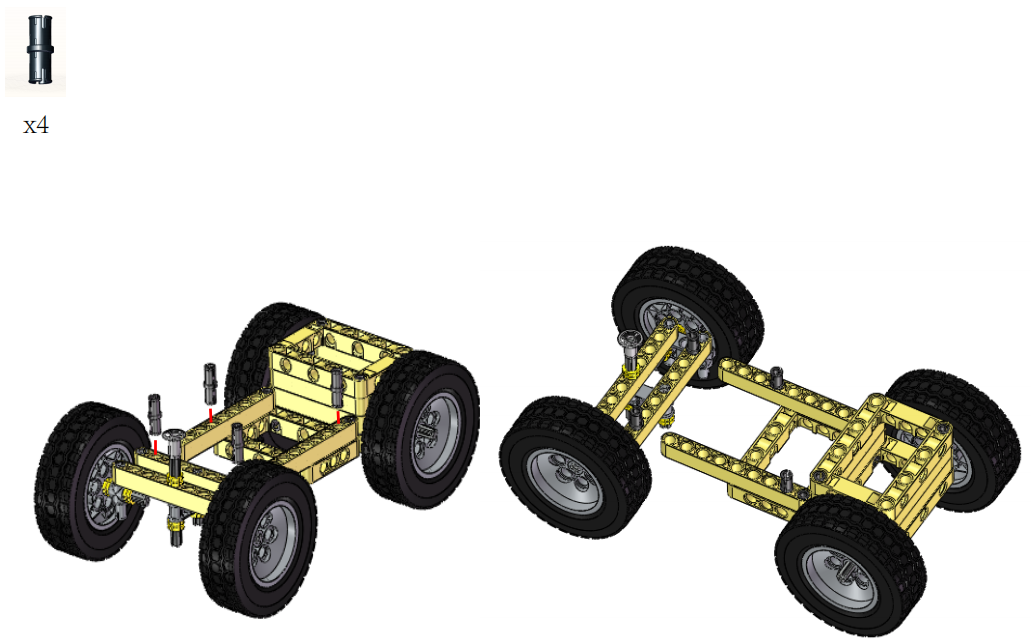
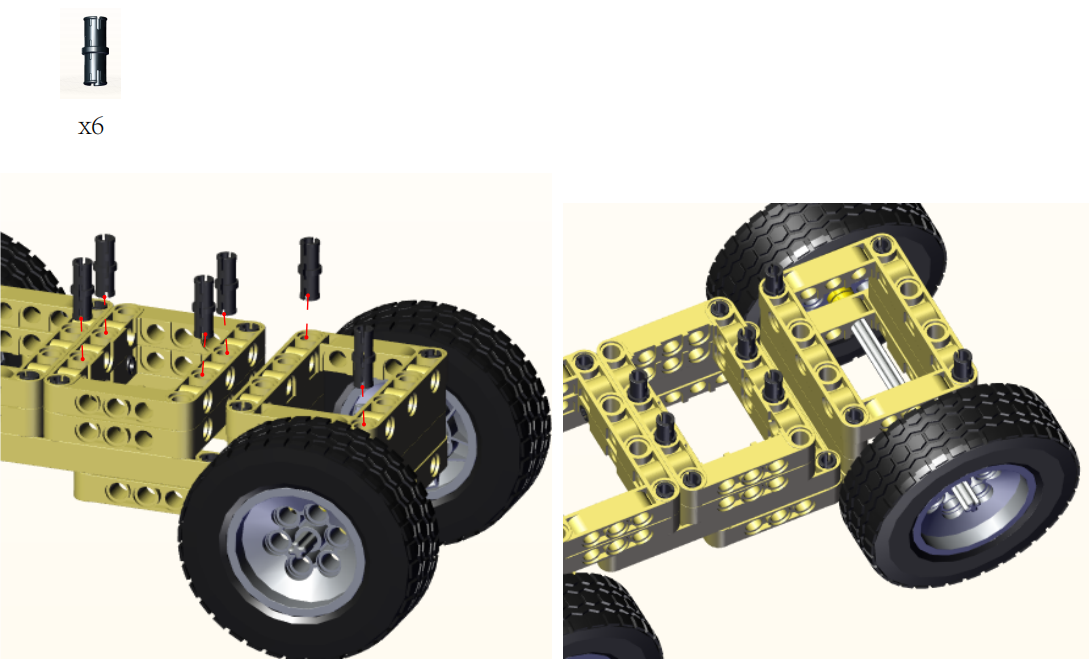
Step1:
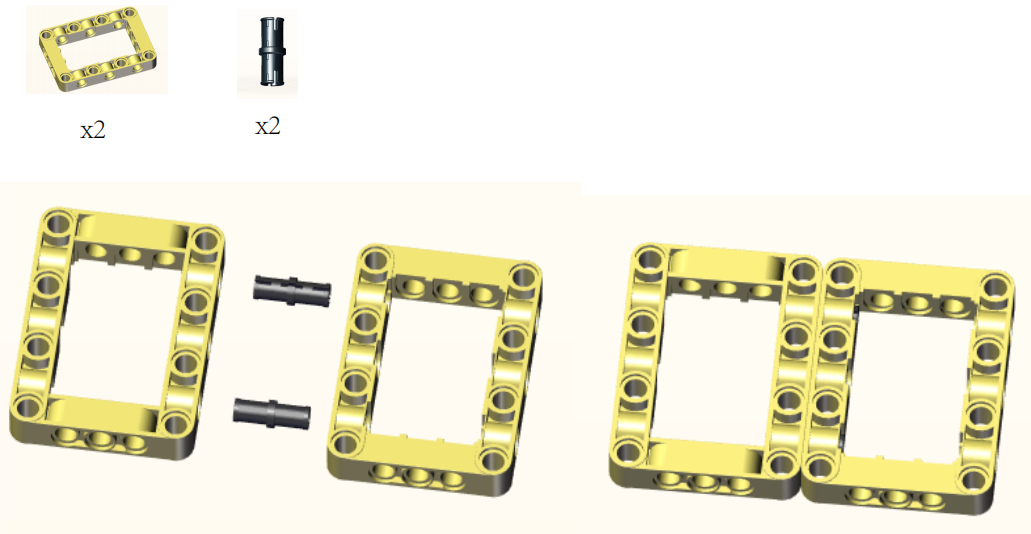
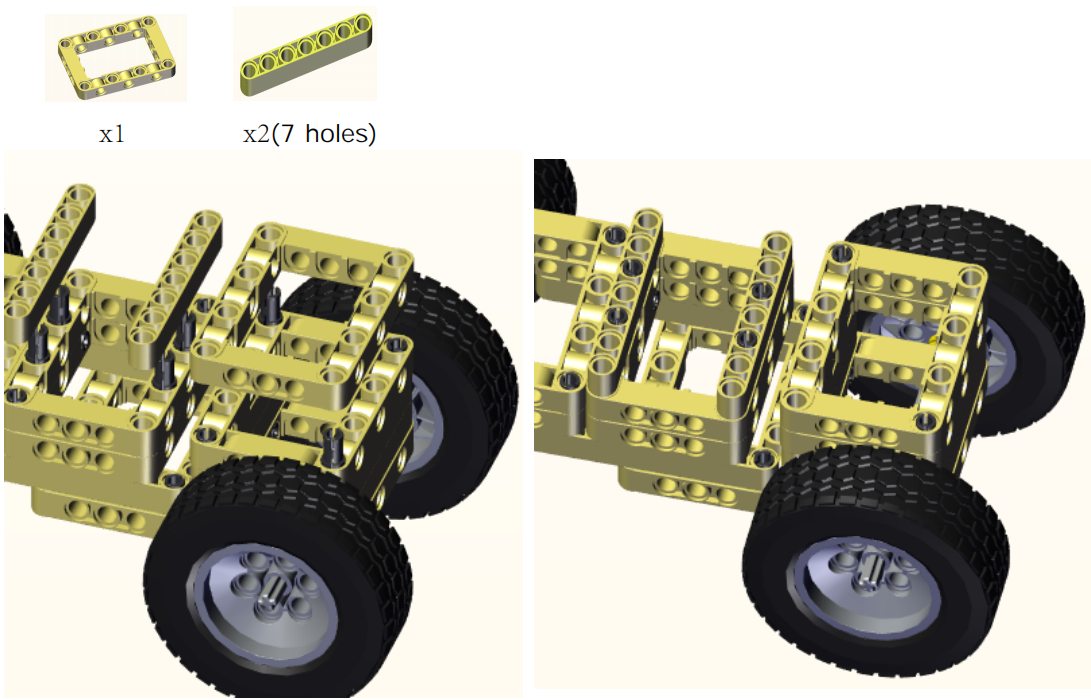
Step2:
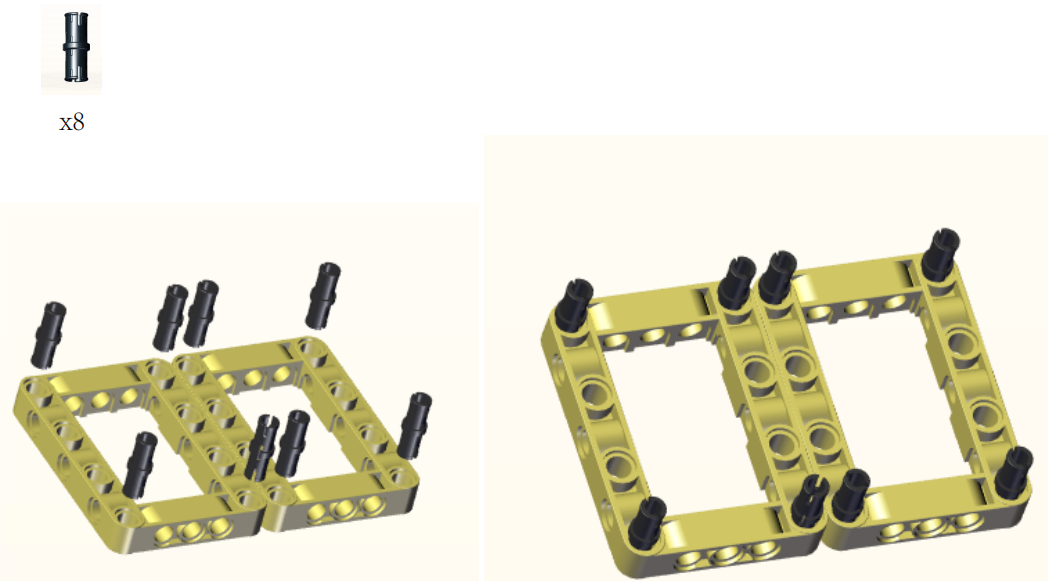
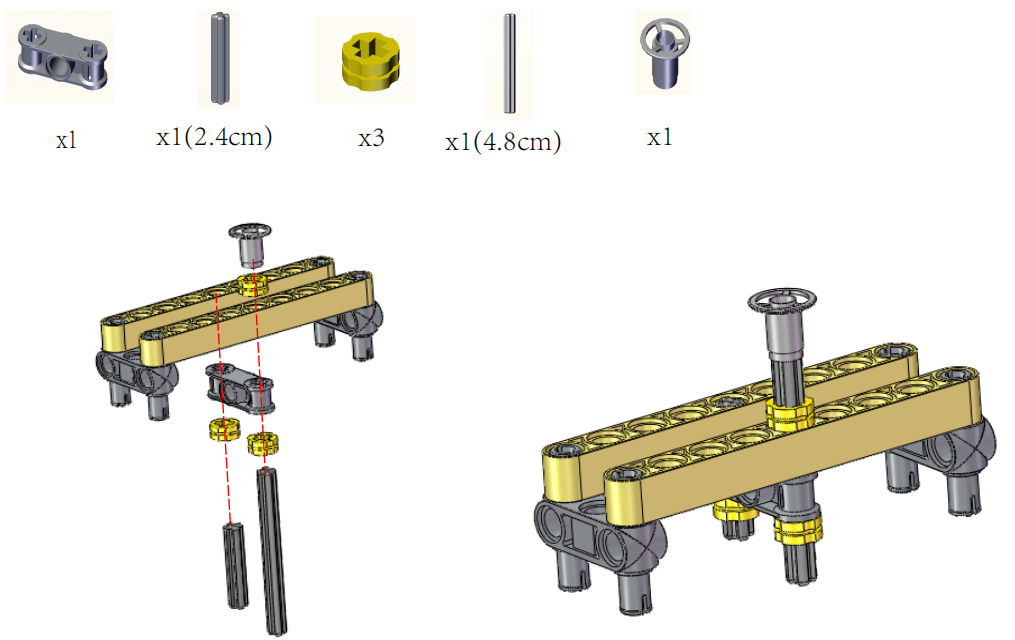
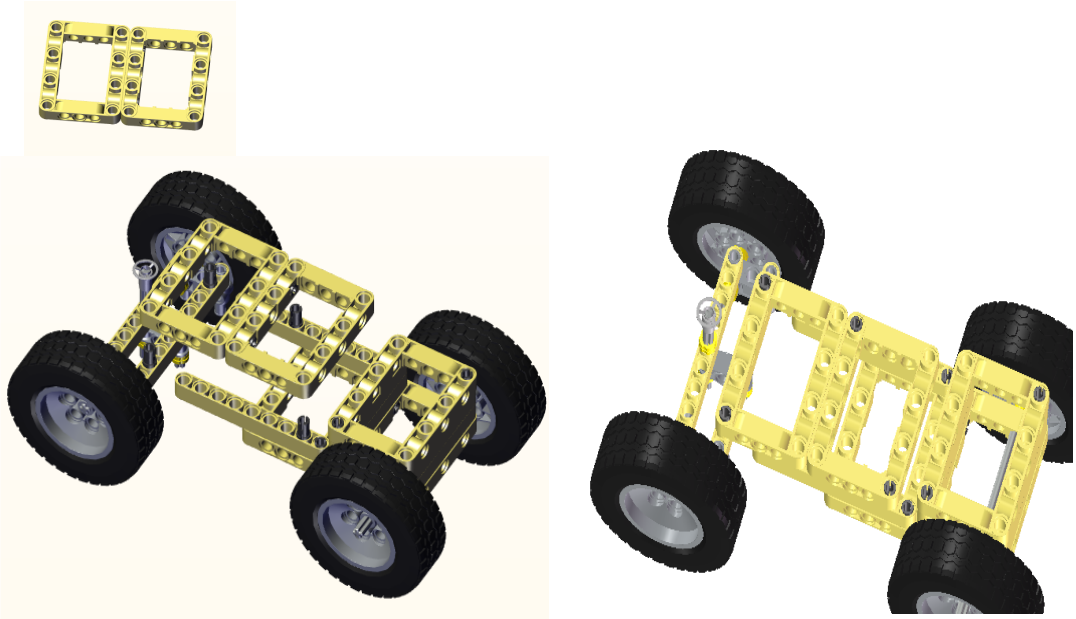
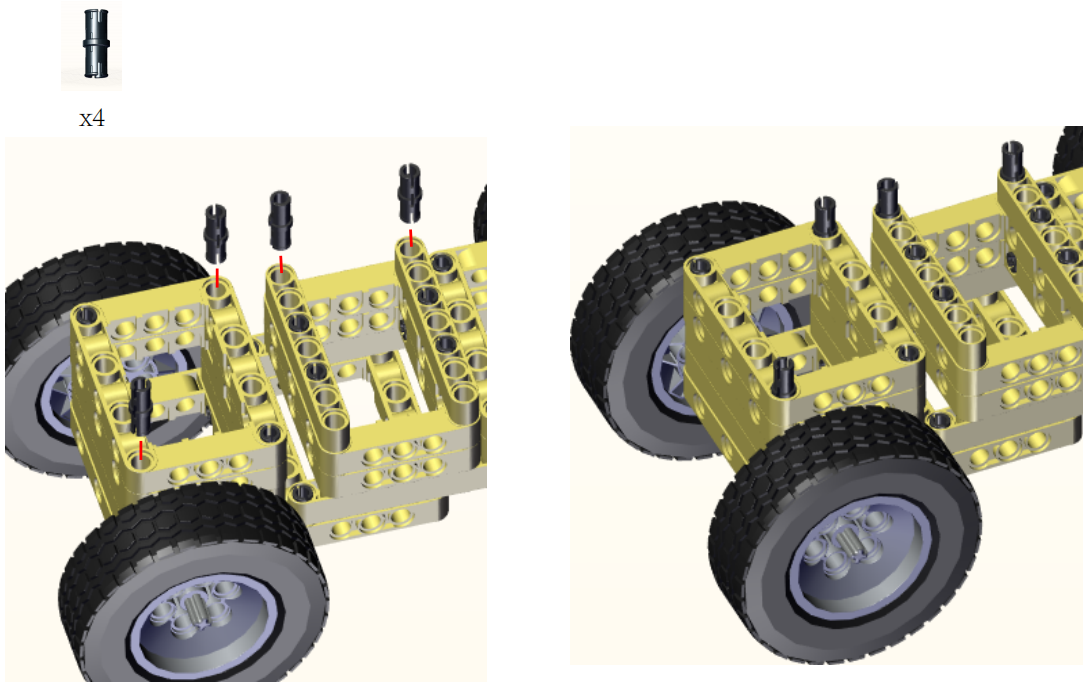
Step3:
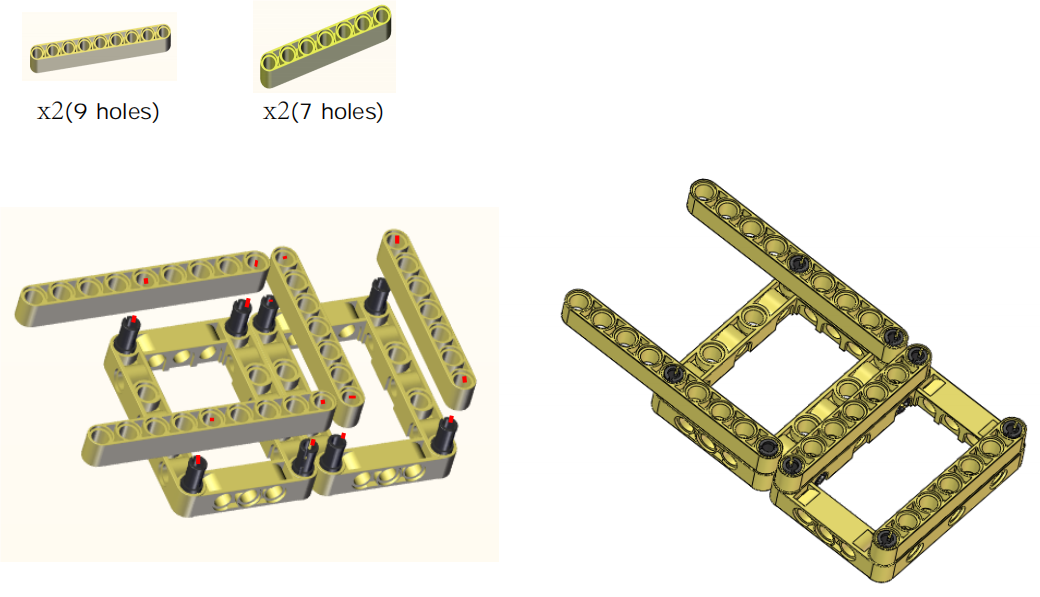
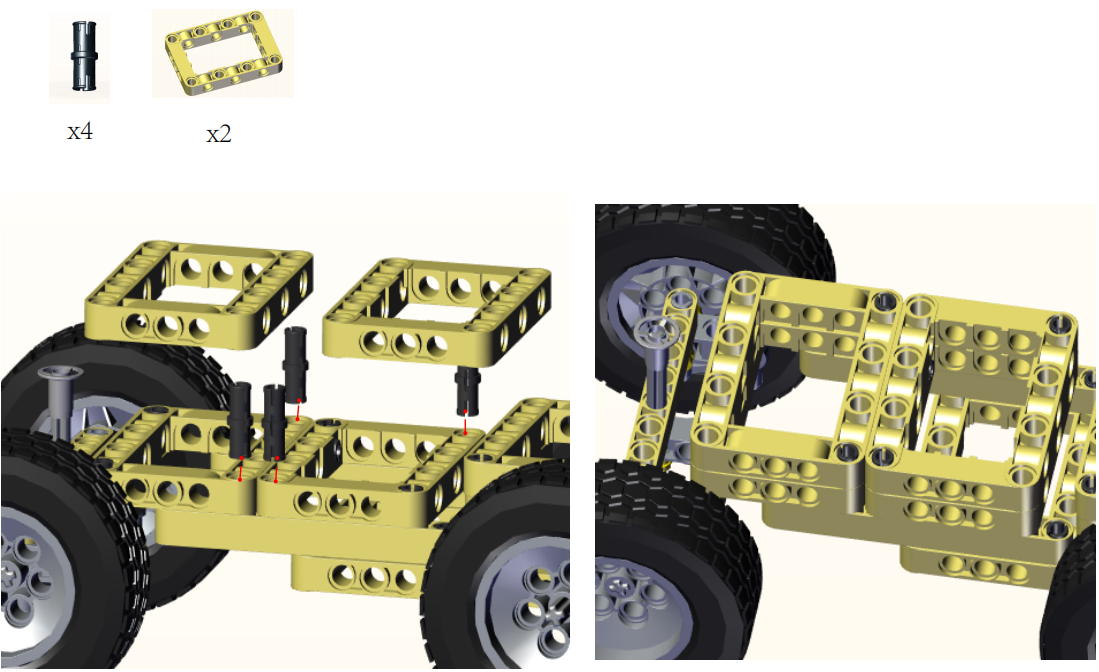
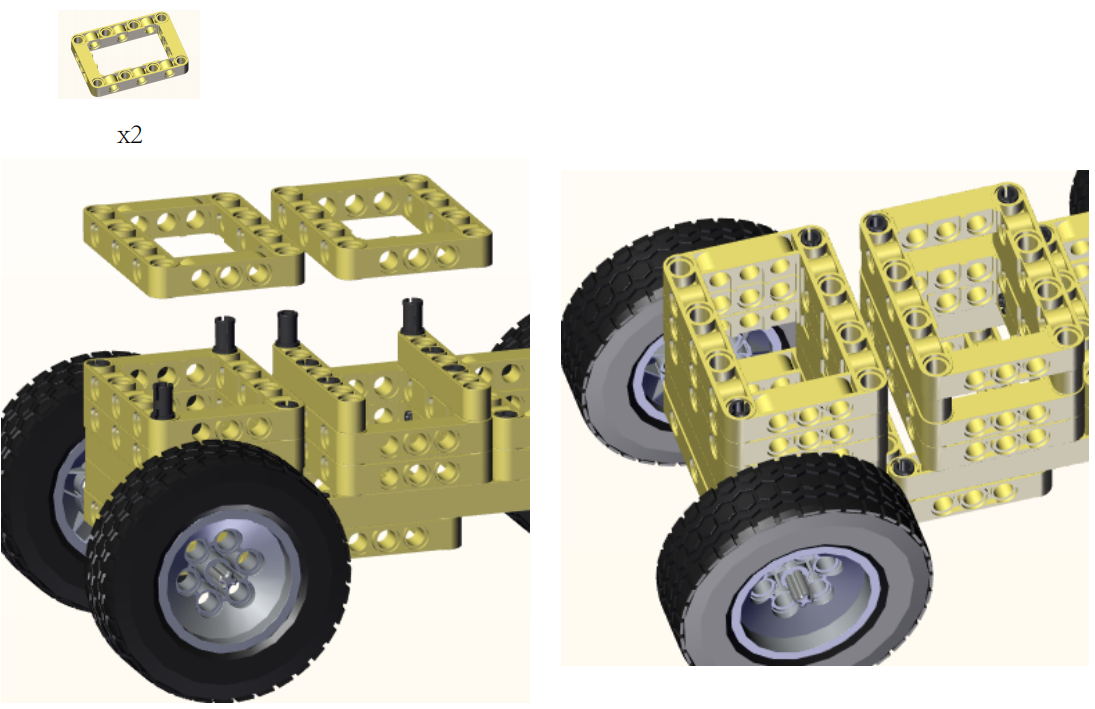
Step4:
Step5:
Step6:
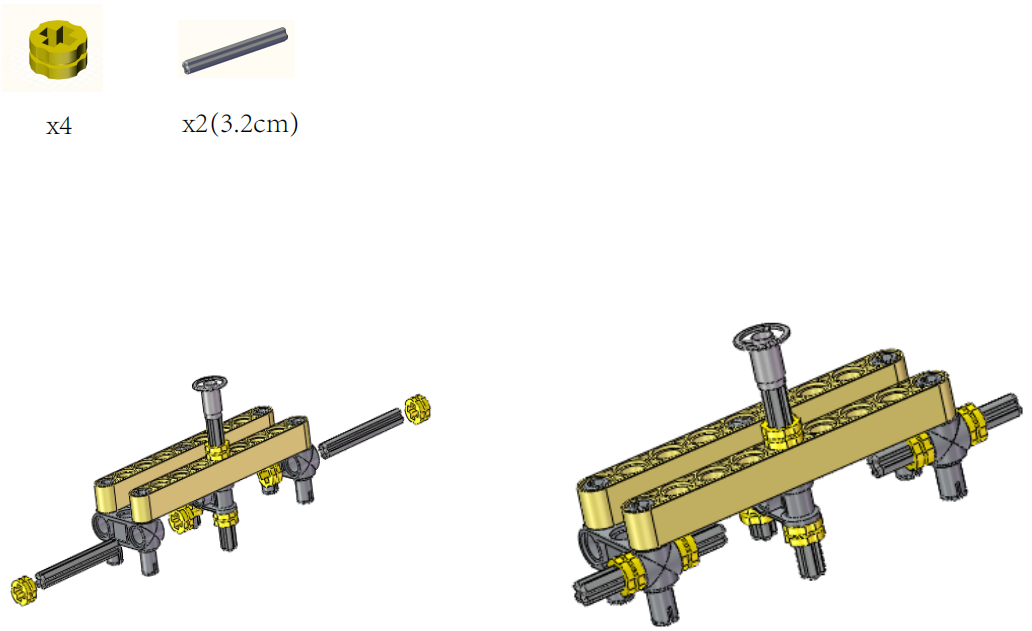
Step7:
Step8:
Step9:
Step10:
Step11:
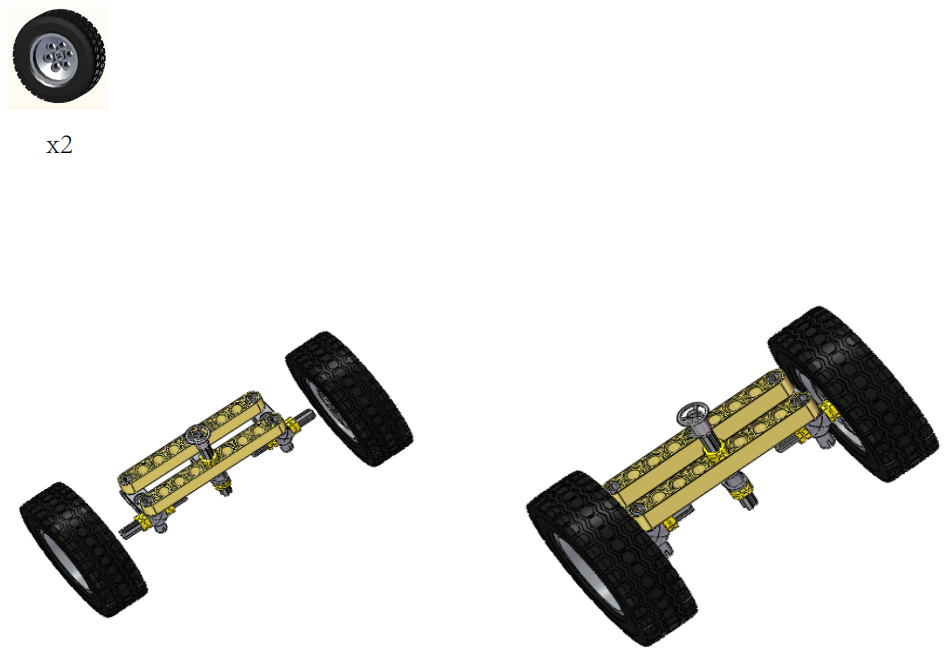
Step12:
Step13:
Step14:
Step15:
Step16:
Step17:
Step18:
Step19:
Step20:
Step21:
Step22:
Step23:
Step24:
Step25:
Step26:
Step27:
Step28:
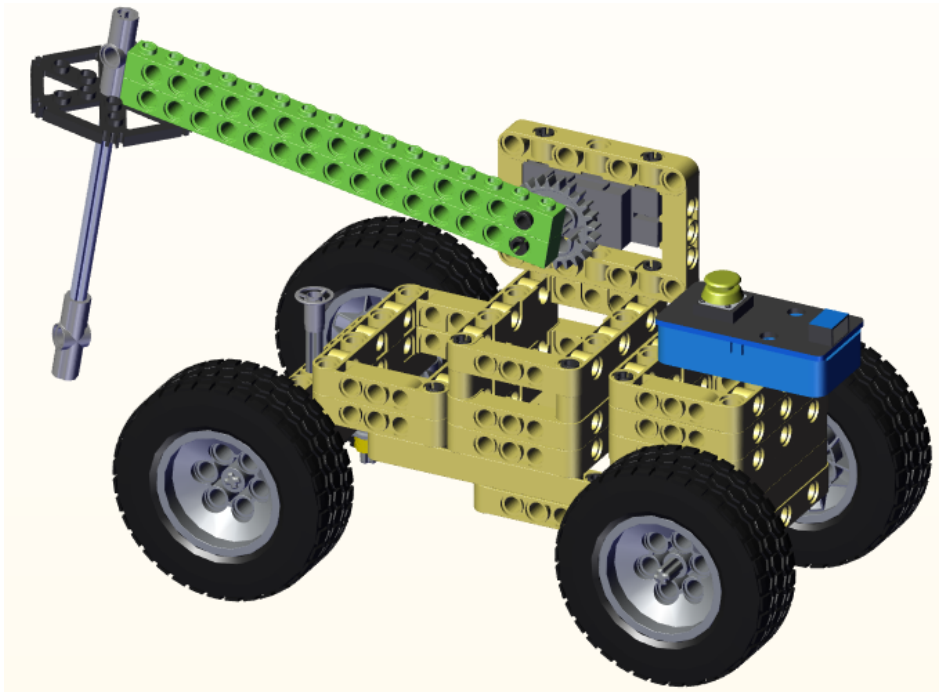
Complete:
4. Read the Button Value
5. Programming Steps
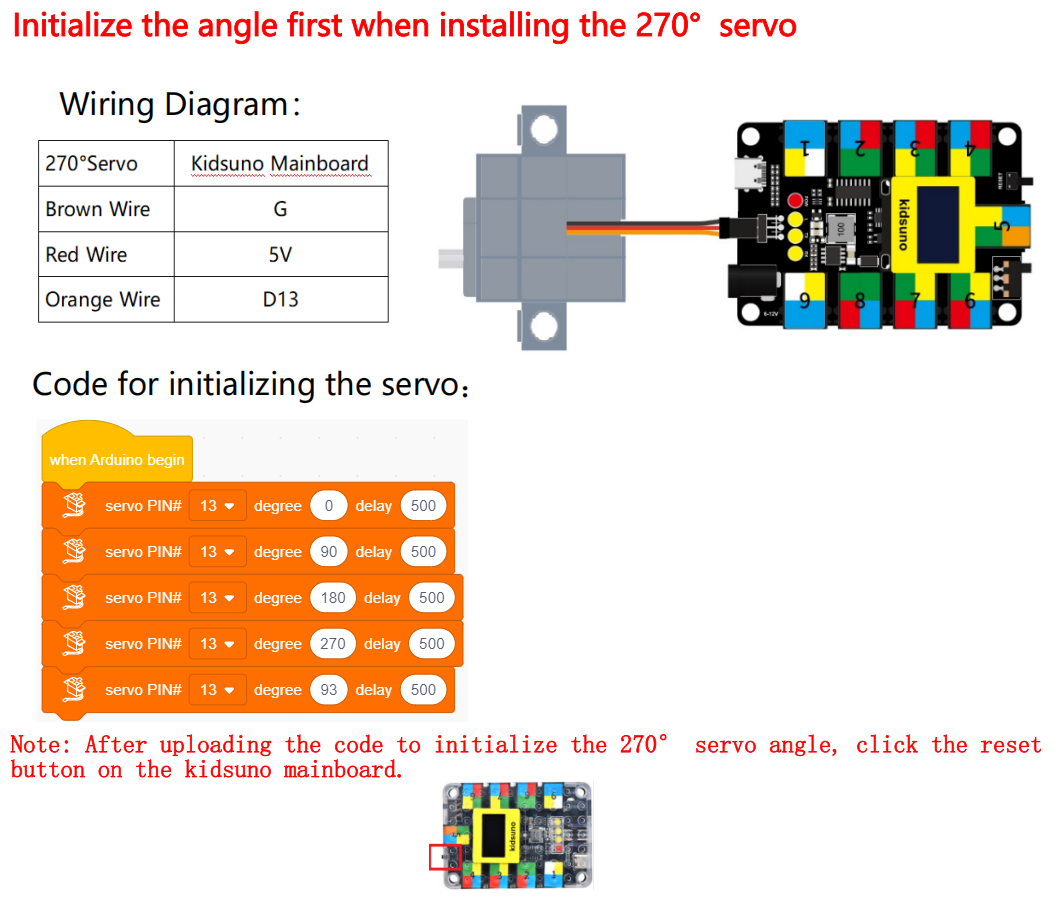
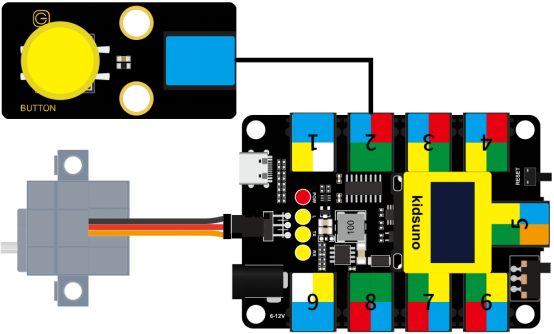
Step1:Wiring Diagram
Connect the kidsuno mainboard and computer via a USB cable, and connect the button module to No.2 interface and the 270° servo to the G, V and D13 interface of the mainboard. The brown wire is connected to G, the red wire is connected to V and the orange wire is connected to D13.
Step2: Description of Building Blocks
Please refer to Project 02: Mixer
Step3:Write the Program
① Drag the instruction block  in the Events module to the script area.

② Drag the instruction block  in the Serial module to the script area and take the baud rate 9600 as an example.

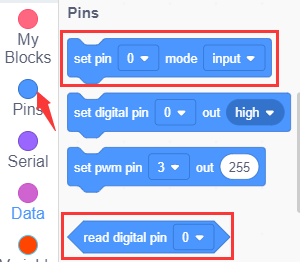
③ Drag the instruction block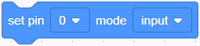 in the Pins module to the script area. Since the button module is connected to D6 of No.2 interface on the mainboard, then change the number 0 to 6 .
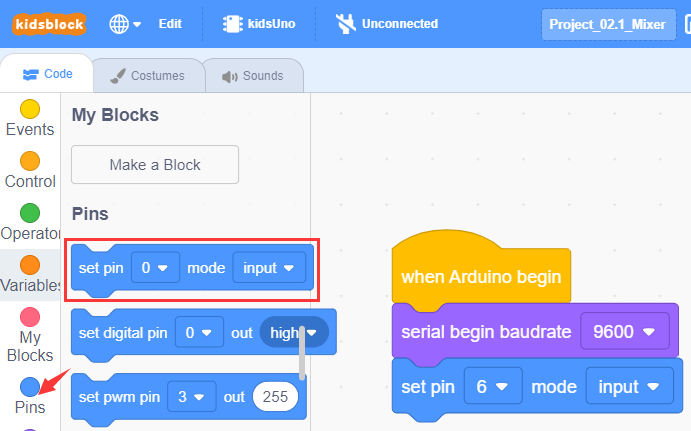
④ Drag the instruction block  in the Control module to the script area.
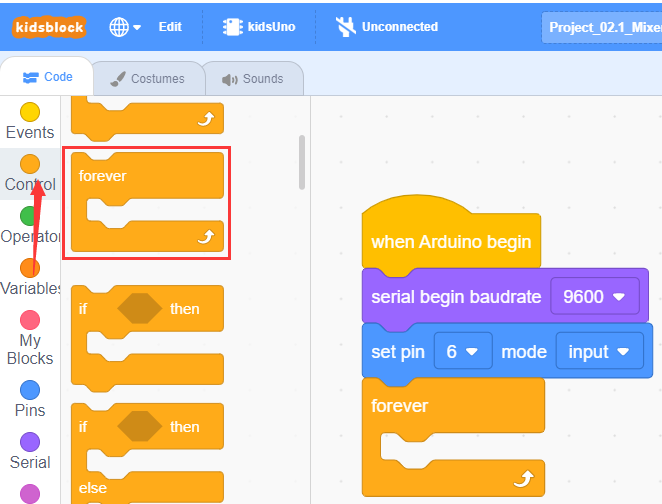
⑤ Drag the instruction block in the Serial module to the script area.

⑥ Drag the instruction block  in the Pins module to the script area and put it into the block , then change the number 0 to 6.

⑦ Drag the instruction block  in the Control module to the script area and change the number 1 to 0.2.
⑧ Complete Program

Step4:Test Result
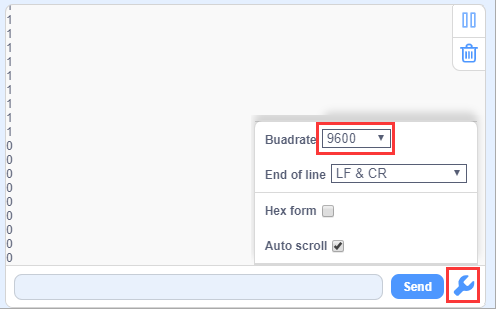
Click to upload the complete program to the kidsuno mainboard and power up, then click
  in the serial monitor area to set the baud rate to 9600. The serial monitor will print the value read by the button module, when you press the button on the module, it will output a low level (0); when you release it, it will output a high level (1).
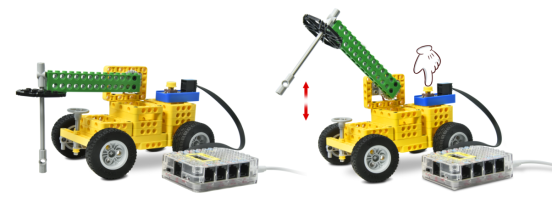
6. Button Controls Breaker
7. Programming Steps
Step1: Description of Building Blocks
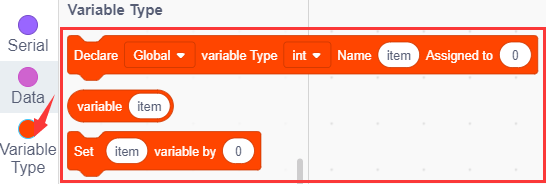
This is the variable module. Let’s look at it!
There are commonly used declare global numeric variable type integer name assigned to 0, variable and Set variable to 0 instruction squares:
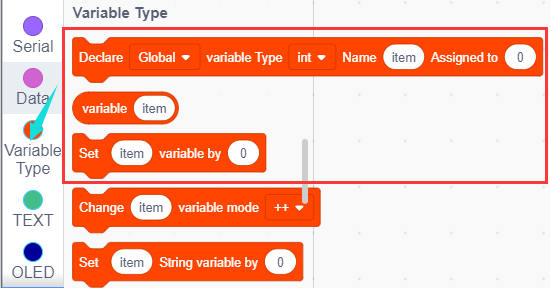
When you need to use this variable, drag the block directly into the script area to edit it!

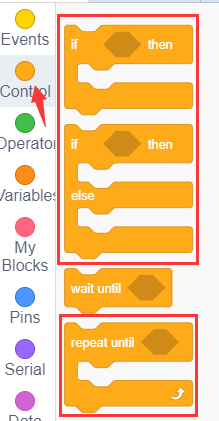
It is a conditional statement code executing if-then function: If the logical judgment statement in  is satisfied, the code statement below then is executed.
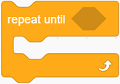
It is a conditional loop statement, it will loop forever if the condition in is satisfied.
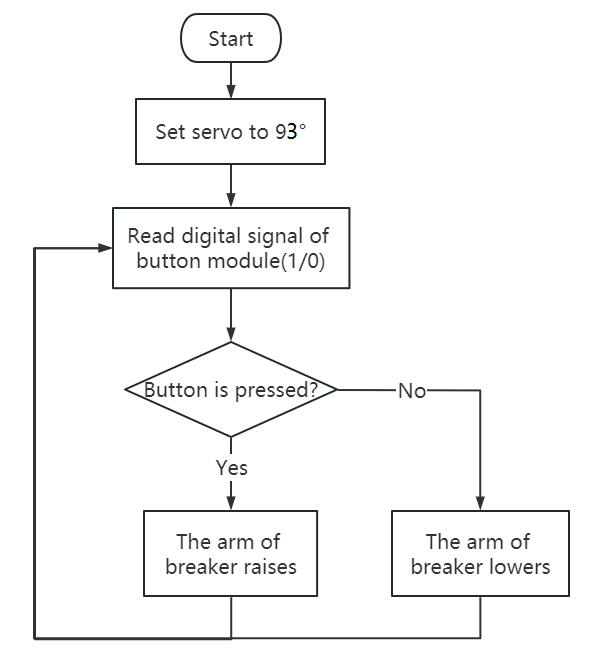
Step2: Flow Chart
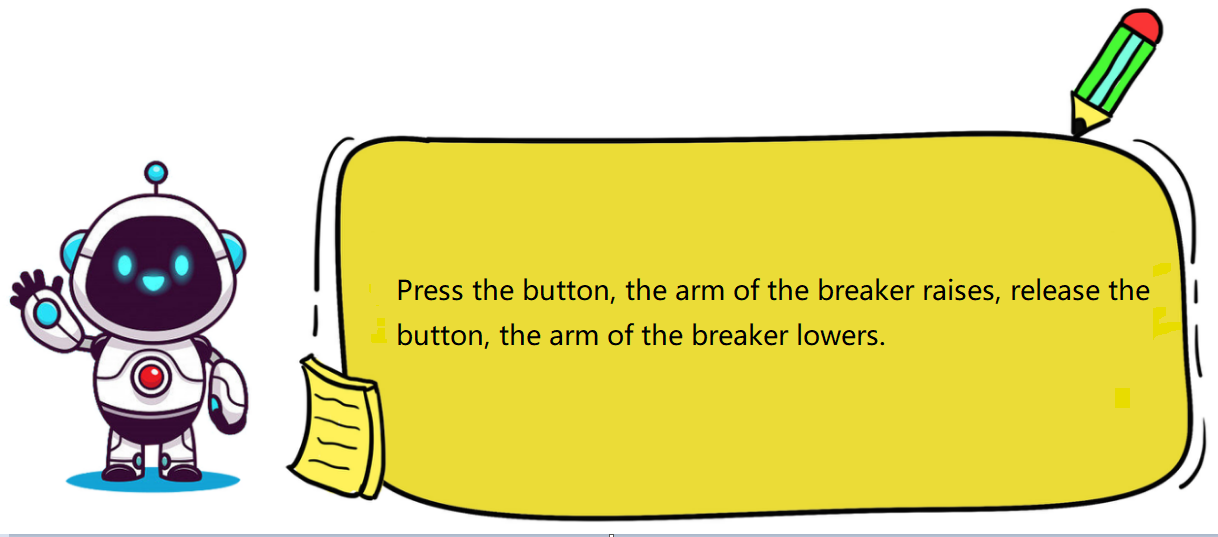
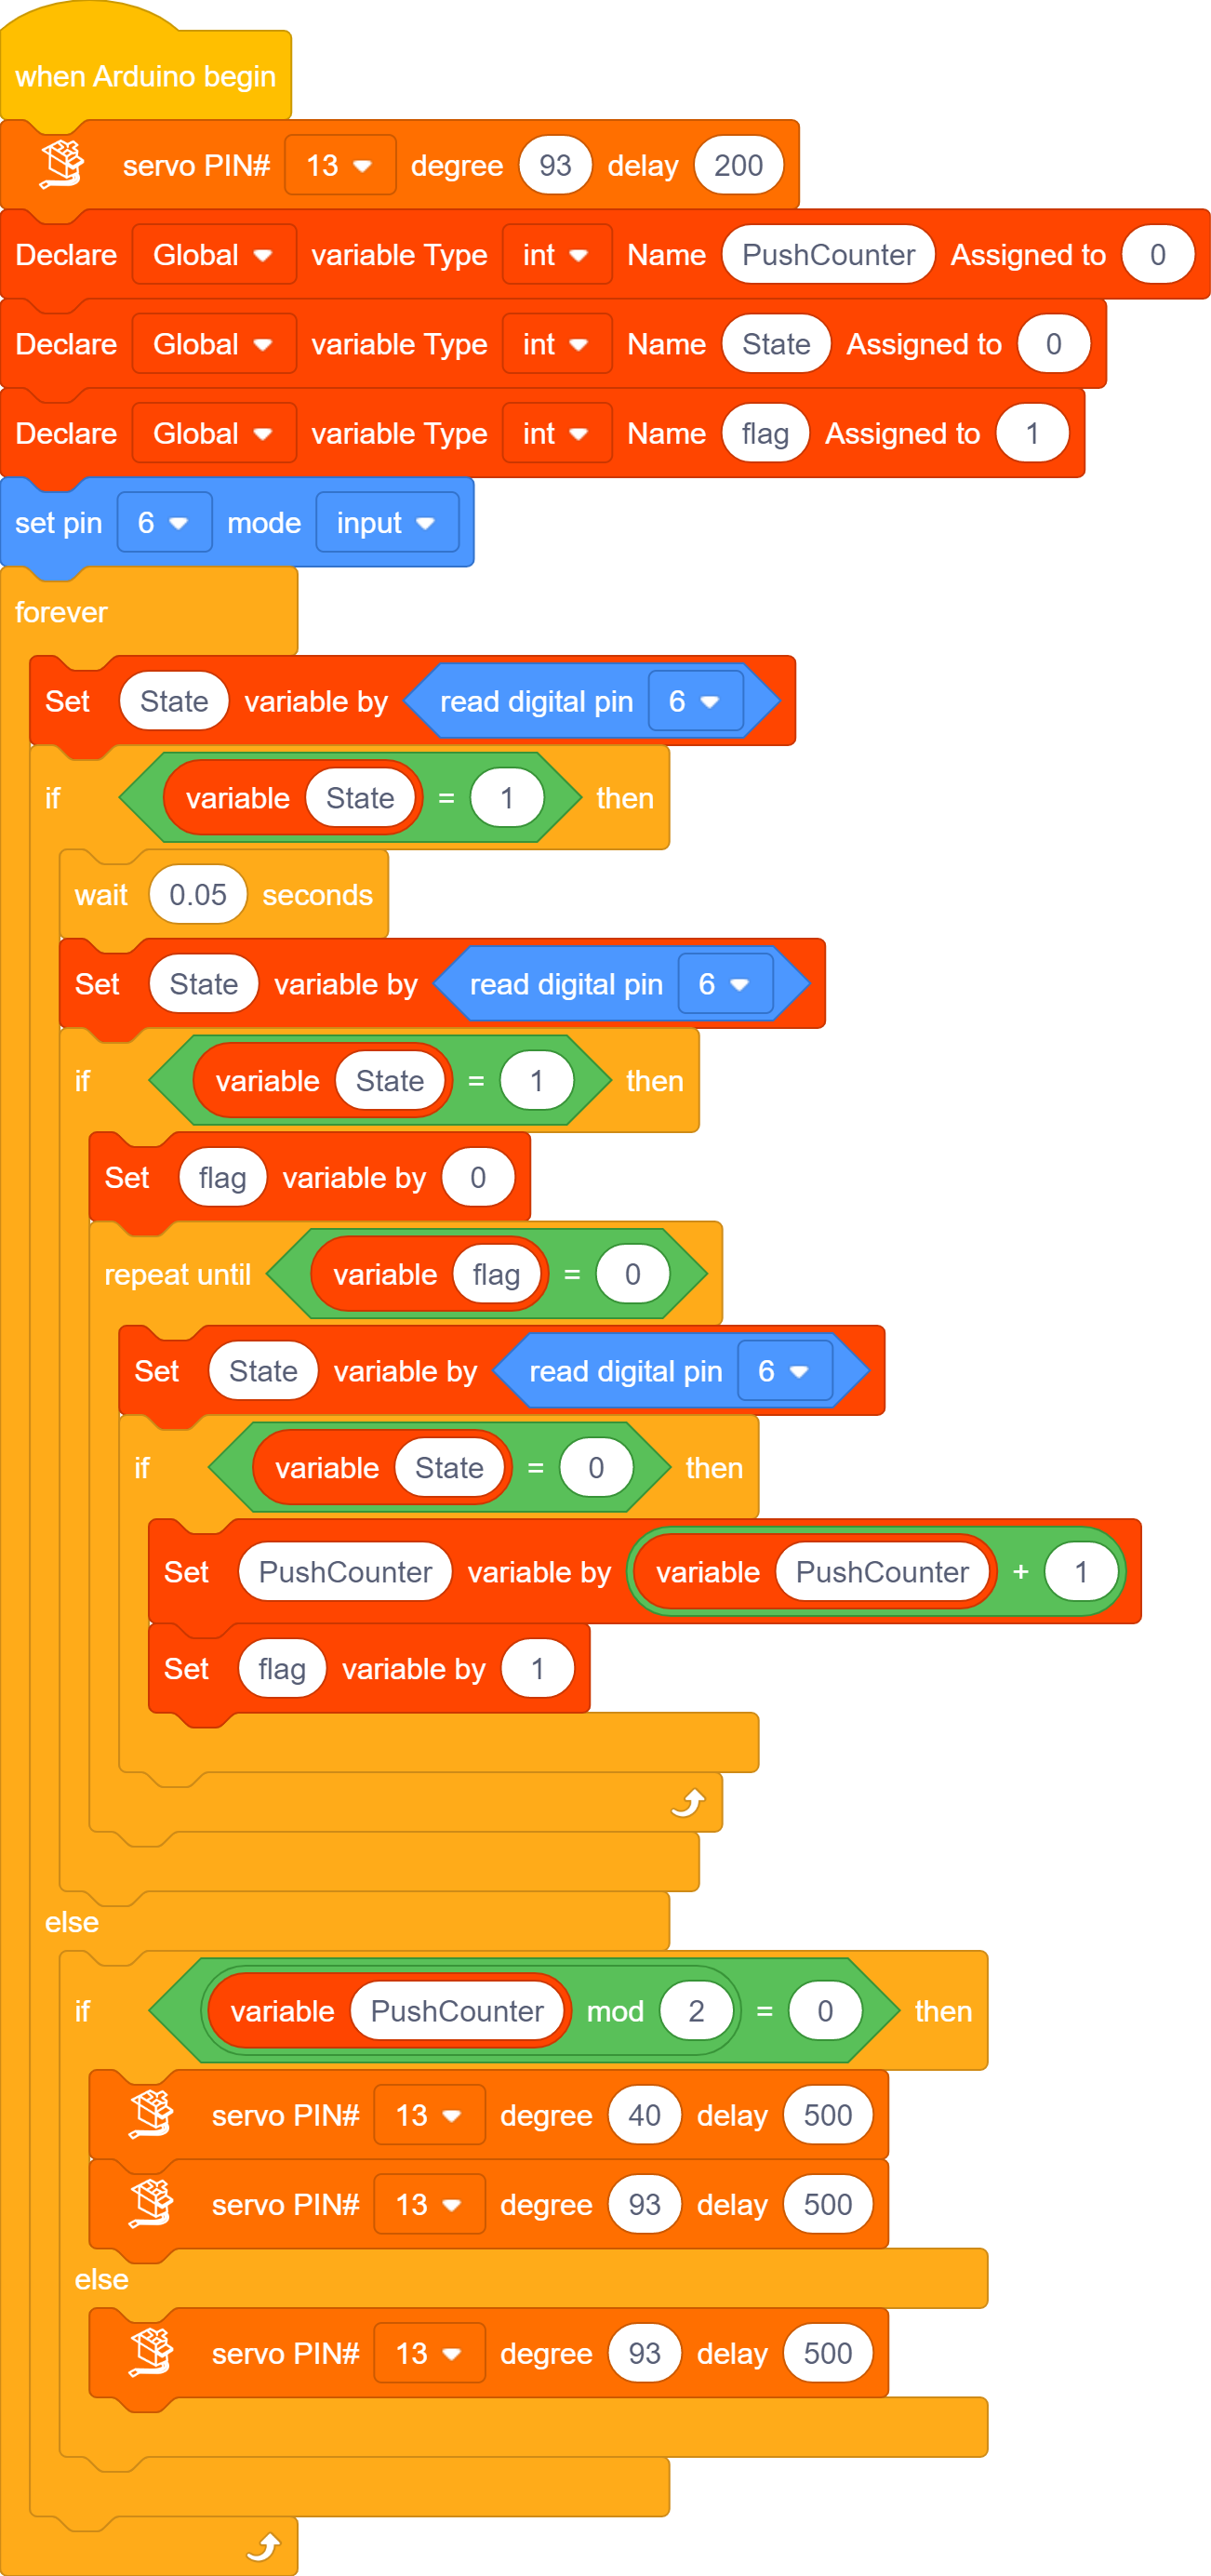
Set the 270° servo to 93°. When the button on the module is pressed, the long arm of the breaker will be raised; when released, it will be lowered. (press the button and then release it will complete a beat.)
Step3:Add Servo

Step4:Write the Program
① Find building blocks
(1)
(2)
(3)
(4)
(5)
(6)
(7)
(8)
② Complete Program
Step5:Test Result
Clickto upload the complete program to the kidsuno mainboard and power up. When the button on the module is pressed, the long arm of the breaker will be raised; when released, it will be lowered. (press the button and then release it will complete a beat.)